Sun Care and Safety during Cancer Treatment
Radiation and chemotherapy treatments, as well as some medications, can increase your susceptibility to sunburn and skin damage. Sun care is especially important when you are undergoing treatment.
Receiving Radiation?
As a general rule, no sun exposure is a good idea when you’re receiving radiation treatment if the site of the treatment is exposed skin. Your doctor may not want you to put sunscreen or any cream on while you’re receiving radiation treatment as the skin is prone to injury at that time.
Sun Safety During Treatment
Apply sun protection daily and liberally – a dollop about the size of a golf ball – to all exposed skin, such as the lips, ears, scalp, sides, and back of neck
Get in the habit of applying sun protection every morning, about 20 to 30 minutes before going outside, and reapply often – about every two hours
Remember that you’re still exposed to UVA/UVB rays even in shady areas. If you’re indoors, windows do not protect against UVA rays
Stay inside during the intense-sun hours of 11 a.m. to 4 p.m. Wear clothing especially formulated with SPF when you have to go out into strong sun.
Have more skin-related questions?
Find practical answers in our Shaving & Men’s Skincare Workshop.
Let’s navigate this together
Join a community that understands. Receive expert advice, useful resources, and compassionate tips throughout your cancer journey in the LGFB newsletter
Newsletter Form
Body Image after Cancer Treatment and Surgery
For many people living with cancer or in remission, changes in appearance can be a major source of concern and anxiety. This is not vanity. Much of our identity is related to our physical appearance from how we wear our hair to what clothes we choose. Body shape and size, including breasts, are often tied to a sense of self, self-expression, sexuality, and self-esteem.
Appearance Related Side-effects
Appearance-related impacts of cancer can be temporary (like hair loss and skin changes) or more permanent (like surgery or scarring). They can all affect a person at a time when they may already feel vulnerable, which can negatively impact their mental and emotional health.
For anyone facing a cancer diagnosis, there’s enough to cope with emotionally without also feeling that there’s no space to speak about body image issues or that it is somehow selfish or vain to worry about them. For Dee-Jay Jodoin, a B.C. woman in remission, changes to her physical appearance like hair loss and weight gain were hard to accept.
The Physical and Emotional Connection
“People going through cancer treatment often experience a change in their body image and in their relationship with their body,” says Monique Voorn, a social worker at the Simcoe Muskoka Regional Cancer Centre in Barrie, Ontario. “They may be unhappy about how their appearance has changed, whether they’ve had breast surgery or scars they don’t like, or lymphedema. Sometimes, a woman may not have had significant visual changes to her body but feels like her body has failed her or that she can’t count on it.”
There can also be physical changes that a person may not expect. “With radiation, there are skin changes,” notes Larissa Dyck, an oncology nurse in Calgary, Alta. “The area that’s treated darken and may take a while to fade, and skin can get tighter and be uncomfortable for some patients, causing a loss of range of motion.”
Keloids – a type of raised scar that can arise after a surgery. These can be a particular concern for Black women specifically.
Weight can be an issue, too. Being on hormones can cause weight changes that can turn women’s body image completely upside down and they can get really down on themselves.
It takes time for women to recognize and appreciate the full impact of the changes they’ve undergone during their cancer journey. “It’s often near the end of treatment when it really hits women what they’ve been through and all the changes they’ve undergone – physical and otherwise,” says Dyck. “When patients are finished their treatment, they expect things to go back to normal — but they may still be on long-term hormones or medication, and that’s when it can be really hard. They expect their bodies to just bounce back, and they want to go back to work and exercise, but things aren’t the same as before.”
Empowerment is Different for Every Person
While physical symptoms can affect a person in a finite number of ways, the emotional experience is different for everyone.
“When some women lose their hair with chemo, they’ll proudly wear a head scarf. Other women have a complete loss of identity and want to wear a wig. They may fear that their partners won’t be attracted to them.”
Larissa Dyck
– Oncology nurse from Calgary, Alberta
“There’s a wave or rollercoaster ride of emotions in any type of cancer. There’s a lot of grief. We grieve all kinds of changes or losses in our lives that cancer brings — to your body, to your innocence, and to the carefree way that you may have used to experience life.”
Monique Voon
– Social Worker from Simcoe Muskoka Regional Cancer Centre
EVERY DAY WE HELP PEOPLE FEEL LIKE THEMSELVES AGAIN
Look Good Feel Better workshops help women, men and teens with cancer learn how to manage the physical, social and emotional impacts of cancer and its treatment in small and supportive groups.
Skincare & Makeup: Learn how to care for sensitive skin plus tips & techniques for managing the loss of brows and lashes, adding colour back to the face, makeup hygiene, and sun safety.
Bras & Prostheses: Learn about options available for post-surgery and beyond, what to expect at a breast form fitting, tips for where to find financial coverage, and more.
Wigs & Scarves: See a demonstration on various head coverings, what to consider when selecting a wig, easy scarf-tying techniques, plus caring for your scalp during and after treatment.
Teens: This special workshop just for teens includes skincare, on-trend make-up tips to feel your best and a demonstration of fun styles for caps, wraps, and hair alternatives.
Let’s navigate this together
Join a community that understands. Receive expert advice, useful resources, and compassionate tips throughout your cancer journey in the LGFB newsletter
Newsletter Form
When to use Breast Forms
There is nothing wrong with wanting to feel like yourself. If you’ve been medically cleared to wear breast forms, then you should wear one whenever you choose to.
Some women use breast forms while waiting for reconstruction
Wearing a breast form may help minimize shoulder droop for some people
They can be worn all the time, just on certain days or during certain activities
Others opt not to have reconstructive surgery and use forms as a long-term option
Lots of other people choose to not wear one at all and “live flat”
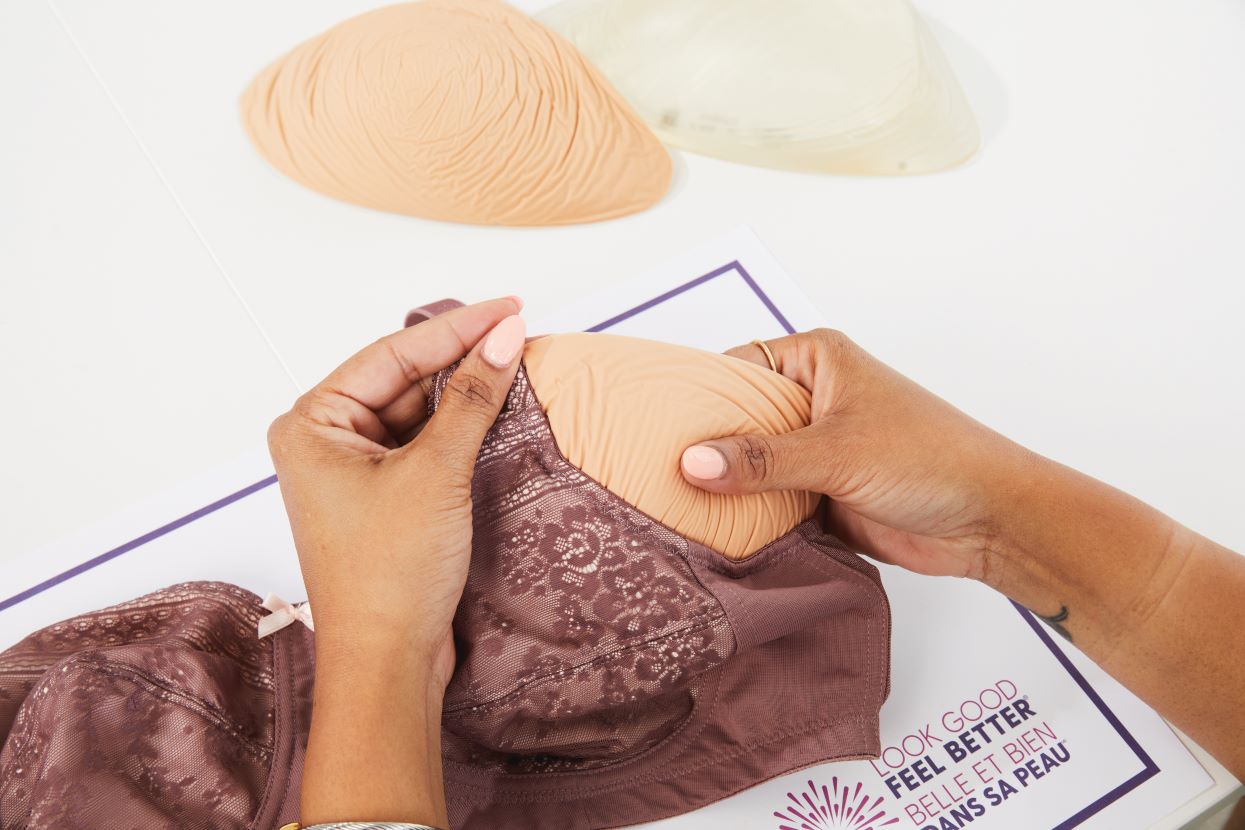
Types of Breast Forms
Should you choose to wear a breast form, there are lots of different options out there. They vary in weight, material, size and shape. Take the time to explore your options and find the best one for you. Some are even made specially for exercising and swimming.
Custom made breast forms are also available if you aren’t able to find a shape that works for you.
Breast form varieties include:
Various weights that can be very lightweight or match natural breast weight
Different shades to better match skin tones
Partial forms available for lumpectomy
Symmetrical or asymmetrical to match your natural shape
Special forms for swimming or sports
Different materials including silicone, gel, fiber fill, and foam
After Surgery
During the 6-week healing period, you won’t want to add weight or compression to the area. Initial breast forms, which are made of a lightweight, loose fibre, are a good option. Some women like the lightweight fibre of an initial breast form and choose this option as their standard breast form after the recovery period has passed.
Others prefer the weight of a standard breast form as it can feel more what they are used to.
Some women refer to the “hug test” – or what makes them feel most comfortable when hugging another person. Knowing what will work for you will depend on your needs and what makes you comfortable.
Partial Forms
Partial forms or protheses are used after a lumpectomy or lymph node removal. They can also be used several years after a reconstruction to match changes in your other breast due to changes in weight and natural changes over time.
They help balance shape and create symmetry. There are lots of options for every shape and size to match the other breast.
Preparing for a Breast Form Fitting
- Most fittings are more than an hour – call and book an appointment
- Schedule 6+ weeks after surgery
- Ensure you don’t have any swelling to find a proper fit
- Wait until there’s no drainage at site
- You should be completely healed: no wounds or bandages
- Bring a fitted t-shirt to test how your bra looks underneath it
Nervous about going into a retail breast form shop?
Consider asking for recommendations from your cancer care centre, friends or family members, or search online. You can also reference Anita Canada’s list of certified retailers to find one near you.
Call ahead and ask some of these questions:
Do they carry a full range of products?
Will they explain the differences in products to you?
Do they offer private fitting rooms?
How busy will they be at the time of your appointment?
Is the retailer knowledgeable of various surgery types and treatments?
Let’s navigate this together
Join a community that understands. Receive expert advice, useful resources, and compassionate tips throughout your cancer journey in the LGFB newsletter
Newsletter Form
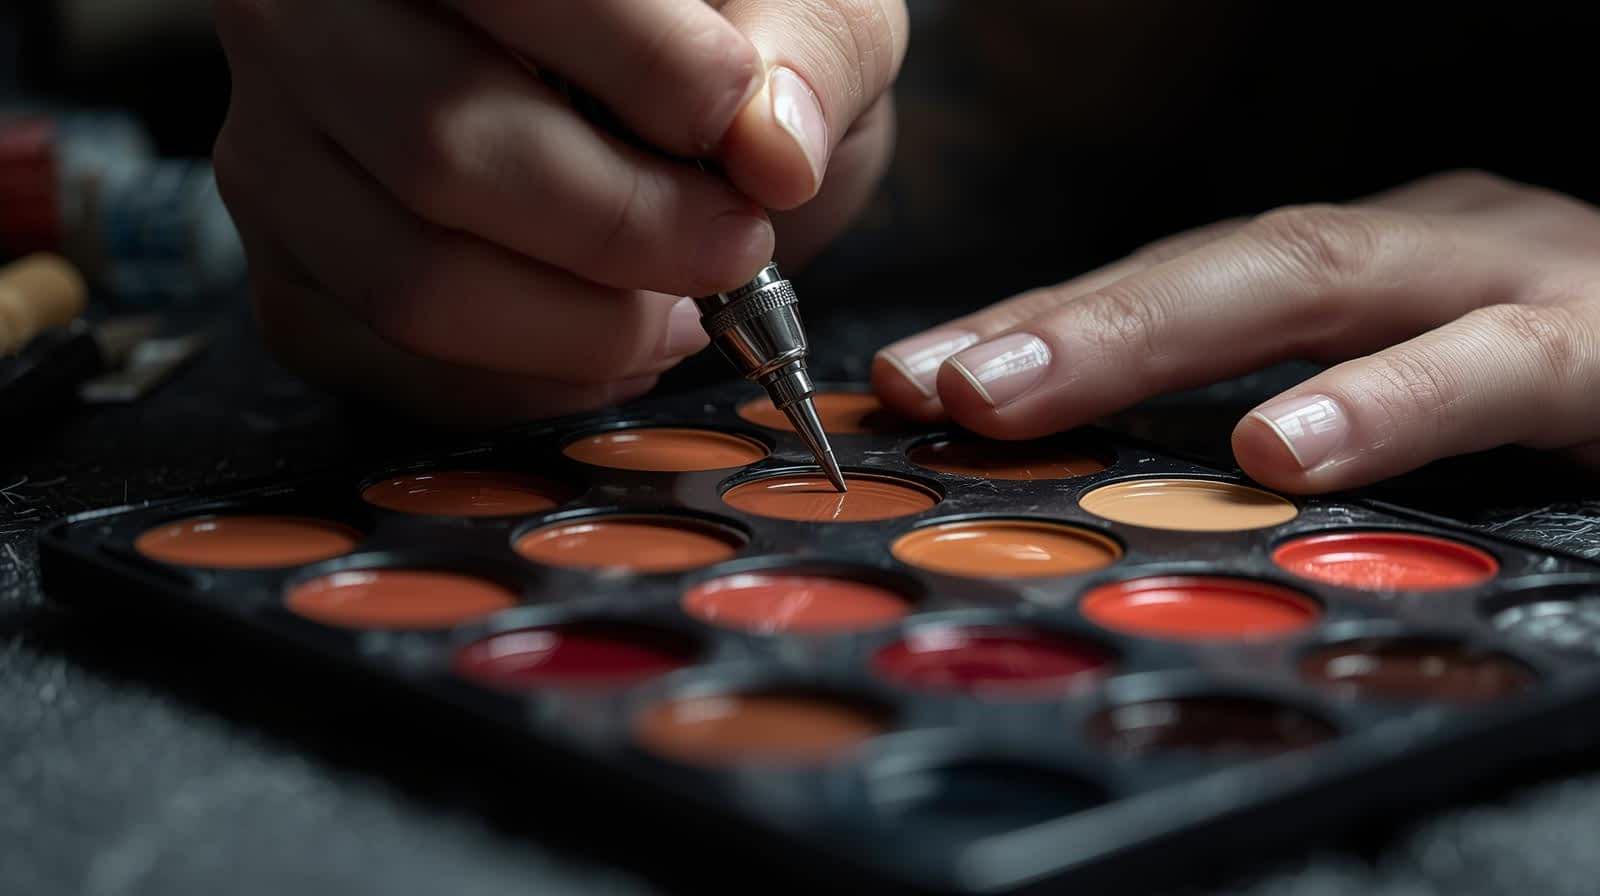
Is Areola Restoration (a.k.a. Nipple Tattooing) right for you?
Nipple tattooing uses ink and shading techniques like traditional tattooing; this gives the illusion of 3D nipples where none exist. After breast cancer surgery, some people choose in areola restoration because it provides them a sense of confidence, empowerment, and comfort.
Whether you choose to include this in your post-cancer journey is entirely up to you. Here are some of the things to consider if you choose to explore this option.
Is there a ‘Right Type’ of Breast Tissue?
The first important thing to know is that nipple tattoos can be done on any type of tissue:
Reconstructed breast, with or without implants
Reconstructed nipples
Chest wall after a mastectomy
“Is a mastectomy tattoo the same thing as a nipple tattoo / areola restoration?”
No! Areola restoration are realistic tattoos done to look like an areola and 3D nipple. Decorative Tattoos, also known as mastectomy tattoos, are a form of body art that can be used to cover or camouflage scars. These types of tattoos can be any type of design or image. Many patients find it to be an empowering form of self-expression and an opportunity to redefine one’s experience after breast cancer surgery.
How do I find a Nipple Tattoo technician?
You are investing both time and money into the procedure so you should be comfortable with the person doing the work
- The tattoos are permanent, so you want to be confident in your choice.
- If you are feeling overwhelmed, ask a trusted friend to help you make calls and pre-screen with you.
- You might also want to speak to your doctor, medical team, or other women for references too.
- Before deciding on a technician, ask to see photos of the technician’s work. You can also request to call, email, or meet with a former client and ask about their experience.
Consider these things when choosing a technician:
Safety
Choose a place registered with your local public health unit
Tattooing is not regulated under Federal or Provincial governments. Establishments, however, can register with public health and will be inspected and regulated
Public health regulations will include standards on things like hand washing, sterilization, single-use needles, and bagging of machines to prevent the risk of infection
Artistry & Technique
Ensure that the colour, design and shading is skillfully planned and executed. This will help create a realistic areola tattoo. These factors should be customized for you to match an existing nipple, replicate what you are used to or align with your personal preferences. Colour, shape, size is unique to each woman.
Like with art, colour theory is a vital component of tattooing. It’s extremely important that the technician you select is experienced and knowledgeable on the role of skin tones and undertones as well as how they will impact the way colour pigments show up on you.
Before finalizing an areola design on your body, ensure the technician can draw it on paper first. This will show whether they have the artistic skills to deliver on the design you have selected.
Proper technique will ensure the colour pigment stays vibrant as the skin heals and tattoo develops. Stretching of the skin as the needle is tattooing will also help achieve this and ensure the ink does not fade.
Other things to look for include: no patchiness, clean line work, and smooth shading.
Colour and Camouflaging Scars
Tattooing can cover a scar that is light by making it darker, but it is very difficult to make a dark scar lighter
Laser therapy may help in lightning scars and should be considered if lighting is needed before embarking on tattooing
Empathy
Your needs are important during this experience. Ensure you feel comfortable with your technician
A technician should be patient throughout the process from deciding on a design to respecting your needs for breaks while getting the tattoo
Asking questions and speaking up if you are uncomfortable provides a better experience for you, and also ensures the technician is attuned to your needs
Cost
The cost of areola restoration can vary from $500-$1500 depending on whether it is unilateral or bilateral
Some provinces offer coverage through public health insurance
Though costs may increase with the use of proper PPE and medical grade pigment, you should insist on these
Is areola tattooing right for you?
Get your questions answered in our Areola Tattooing Workshop.
Let’s navigate this together
Join a community that understands. Receive expert advice, useful resources, and compassionate tips throughout your cancer journey in the LGFB newsletter
Newsletter Form
Breast Forms: Fittings and Retailers
Find a Retailer in your Community
There are many retailers across Canada which carry breast care products. Medical specialist shops are one option and they often carry a large variety of products. Larger departments stores and lingerie stores can carry some mastectomy bras and breast forms too.
Consider asking for recommendations from your cancer care centre, friends or family members, or search online. You can also reference Anita Canada’s list of certified retailers to find one near you. Remember to call ahead to book an appointment and ask questions.
Preparing for a Breast Form Fitting:
Most fittings are more than an hour – call and book an appointment
Schedule 6+ weeks after surgery
Ensure you don’t have any swelling to find a proper fit
Wait until there’s no drainage at site
You should be completely healed: no wounds or bandages
Bring a fitted t-shirt to test how your bra looks underneath it
Nervous about going into a retail breast form shop?
Call ahead and ask some of these questions:
Do they carry a full range of products?
Can you try all of the products on?
Will they explain the differences in products to you?
Do they offer a private fitting room with a full-length mirror?
How busy will they be at the time of your appointment?
Is the retailer knowledgeable of various surgery types and treatments?
Let’s navigate this together
Join a community that understands. Receive expert advice, useful resources, and compassionate tips throughout your cancer journey in the LGFB newsletter
Newsletter Form
Caring for Scaring
Healing from cancer surgeries involves both physical and emotional challenges. Managing scar tissue is an important part of your recovery journey.
BEFORE SURGERY:
- If you are prone to keloids, ask your surgeon how this can be best managed with medication, topical treatments or strategic scar placement.
- It is okay to be concerned about scarring and to advocate for yourself!
AFTER SURGERY:
- Follow care instructions from your surgeon to keeping the surgical site clean.
- Once approved by your surgeon (approximately one month after surgery), you can start massaging the scar using either a beauty oil or scar reducing oil.
- Silicone scar sheets can help improve healing.
- Don’t wear clothing that compresses the scar for at least 4-6 weeks after surgery. If that makes wearing a regular bra difficult, try a tube top, tank top, or leisure bra to provide support if needed.
- Wait at least one year after all treatments are done before getting any nipple or decorative tattoos.
Physical Discomfort
It can be discouraging to still feel pain, swelling, tightness, sensitivity or a restricted range of motion after completing cancer treatment. For some people, discomfort may last far past their expected recovery time from surgery or radiation.
Prolonged Discomfort
Prolonged discomfort may be a build-up of scar tissue inside the body, typically around the breast, chest or shoulder area.
Scaring can cause the surrounding tissue to become denser and less elastic and result in restricted movement and/or pain. Some patients describe it as feeling “sticky” or “like Velcro” when they try moving the affected area.
Easing Discomfort
You may want to consider adding a physiotherapist or massage therapist who specializes in caring for breast cancer patients to your care team.
Talk to your primary care team about your concerns and mention this possibility. If you find your medical team resistance to these suggestions, don’t be afraid to advocate for yourself.
Physiotherapy or massage therapy is done on the chest, breast and/or shoulders to loosen and soften tissue.
Your provider may suggest techniques such as:
Myofascial release
Deep friction massage
Cupping therapy
Remember to…
Talk to your surgeon or oncologist to ensure that enough recovery time has passed before booking an appointment with a physio or massage therapist.
What healthcare professionals provide care for scar tissue?
Typically, it will be a physiotherapist or massage therapist who will have specialized expertise and experience working with breast cancer patients.
Refer to the Society for Oncology Massage and Canadian Physiotherapy Association to learn more and access a directory.
Your provincial Lymphedema Association can also be a great resource for therapists familiar with breast-cancer related side effects.
Some healthcare professionals use the term Cancer Rehabilitation to refer to their services that help manage the common side effects of cancer and cancer treatment. This can be a great search term when looking for professionals in your area.
Questions to ask Professionals:
Are you a licensed Healthcare provider registered with the provincial college?
Are you experienced in treating breast cancer patients?
Do you provide techniques I can do at home?
Are these services covered by provincial healthcare?
Are they covered by private medical insurance?
You’re not in this alone.
Find a supportive community and get expert advice in our workshops.
Let’s navigate this together
Join a community that understands. Receive expert advice, useful resources, and compassionate tips throughout your cancer journey in the LGFB newsletter
Newsletter Form
Under $100
The average cost of a post-mastectomy bra is under $100.00.
$200 to $500
Prostheses costs can range between $200.00 – $500.00.
Health Care Plan
Depending on where you live, your provincial healthcare plan may reimburse some costs of breast prostheses.
Private Health Insurance
Depending on the plan, they often will cover prostheses as well as post-operative bras once per year.
Let’s navigate this together
Join a community that understands. Receive expert advice, useful resources, and compassionate tips throughout your cancer journey in the LGFB newsletter
Newsletter Form
What to Wear During Radiation and/or After Breast Surgery
It’s possible you’re feeling a mix of different emotions during treatment or after a mastectomy or lumpectomy. As your body continues to change, your relationship with your body may as well.
Right After Breast Cancer Surgery & During Radiation Treatment
For the first four to six weeks, it is best to opt for: compression-free & wire-free bras and camisoles.
Compression and wire-free bras are often made from soft fabrics and known as ‘leisure bras.’ When shopping for a leisure bra online or in-person, look for something that closes in the front rather than the back.
After a mastectomy your body is still in recovery, and it can be difficult to pull anything over your head or reach behind to clasp the bra. If it is possible to try the garment on, ensure that the bra fits comfortably on the loosest hook. This is so it can be worn looser to begin with and gradually tightened as the swelling goes down.
When to Introduce Breast Forms
A light, fiberfill breast form (also called an initial breast form) can be worn in a bra or camisole if you so choose.
Some initial breast forms allow you to adjust the amount of fill inside to match the size of your other breast if you had a single mastectomy.
"I am having a Lumpectomy."
Follow the information above, however it is good to keep in mind that your medical team may advise you to wear a bra for 24-hours a day for the first week or two after surgery. Like with a mastectomy, look for a bra with:
Soft fabric
No compression
Underwire free
Easy to put on
"Radiation is part of my Care Plan."
Skin and tissue can be sensitive and tender during radiation, so when searching for bras or other garments, look for:
Soft fabric
Underwire free
No compression
Ideally fastens in the front
Other things to consider:
Fitted, but not tight, tank tops made from bamboo cotton offer support and are a great option for many women
While others prefer loose-fitting button up shirts and go without a bra or camisole.
What works best for you might come with some trial and error but having a few different options will be helpful.
You may need to wash the garments often because of regular use of creams and ointments on the treatment site.
"I've had Reconstruction."
Compression bras will be your friend after reconstruction! A compression bra helps to maintain shape and holds the breast(s) in place, preventing pressure points and tissue irritation from forming.
Look for a compression bra made from:
Strong fabric
No seams on the skin
A longer line for comfort
A front closure so you don’t have to stretch to reach a back closure or pull Anything over your head
Lymphedema
Post-Recovery “Everyday Bras”
Recovery time can vary greatly. People can be ready to move into an everyday bra anywhere from two months to one year after treatment is complete.
Mastectomy bras are available in many styles including lingerie, sport and everyday bras. These are specific for post-mastectomy or post- lumpectomy because they come with pockets to hold breast forms. Many have a higher neckline for support and to help cover scars.
If you sew, or know someone who can, you can have pockets sewn into any bra as well – but you may need to experiment a bit to get the right design to hold the breast form.
Remember that your size and shape may have changed post-treatment and post-surgery. A specialized bra retailer can help you find the right size – or check out our bra-fitting tips on our Breast Form Fitting and Bra Tips page.
Still have questions?
Get practical advice and connect with people who understand in our Bras & Prostheses Workshop.
Let’s navigate this together
Join a community that understands. Receive expert advice, useful resources, and compassionate tips throughout your cancer journey in the LGFB newsletter
Newsletter Form
What Breast Form is Right for You?
Here’s what to consider based on your unique journey:
Had a mastectomy? Soft, wire-free bras or camisoles with front closures can be gentler on healing skin. Some come with built-in pockets for drainage tubes or breast forms.
Had a lumpectomy? Your medical team may recommend wearing a bra 24/7 for the first week or two. Look for soft, seamless, and wire-free options that offer gentle support without compression.
Going through radiation? Skin sensitivity is common, so breathable, seamless fabrics are key. Bamboo cotton tanks or front-closing wire-free bras help minimize irritation.
Had reconstruction? Compression bras provide support, reduce swelling, and help maintain breast shape during recovery. Look for strong, seamless fabrics with a longer band for added comfort.
Considering a breast form? Some women use breast forms while waiting for reconstruction, as a long-term option, or just for certain occasions.
Considering “Living Flat?” Many people choose not to wear forms or have reconstructive surgery. They feel comfortable with their body after surgery and decide to live as they are. Talk it through with your healthcare team, friends, family, or other participants in our workshop.
Want to talk with the pros?
Get personalized guidance and support in our Bras & Prostheses Workshop.
Let’s navigate this together
Join a community that understands. Receive expert advice, useful resources, and compassionate tips throughout your cancer journey in the LGFB newsletter
Newsletter Form
How to Choose?
Choosing a wig takes some time and effort, but it will be worth it to find the wig that feels right.
A wig feels different than your natural hair and will take some getting used to. Commit to giving yourself time to adjust to this change. Over time, it can become as familiar as any other accessory in your wardrobe.
The first question that many women consider is what fibre or material to choose. Both can be cut and styled by a hairdresser with wig experience.
When Making the Decision:
Most people choose a wig that matches their colour, texture, and style as closely as possible
Both synthetic and human hair wigs can look natural—fit and placement are key
Consider maintenance and comfort—synthetic wigs are easier to care for, while human hair wigs offer more styling options
Let’s navigate this together
Join a community that understands. Receive expert advice, useful resources, and compassionate tips throughout your cancer journey in the LGFB newsletter