
Hair and Brow Loss During Cancer Treatment
The loss of hair and brows can be just as distressing for men as it is for women, especially for men who have always had a full head of hair. Although it is currently a style statement for some men to have shaved heads, this may not be your personal preference. Hair loss or thinning may or may not happen depending on your specific cancer treatment.
Remember, hair loss is almost always temporary.
Managing Hair Loss
Always comb hair gently and use a mild shampoo (but not a baby shampoo).
As hair starts to thin, consider cutting it short or even having it neatly trimmed by a professional stylist. This can help if your hair becomes thin or patchy.
Don’t shave your head to the scalp. This can cause irritation and potentially cuts or nicks that could lead to infection.
When you’ve lost your hair, your scalp may become drier. Gently massage your scalp with your facial moisturizer to make it feel more comfortable and increase circulation to your stressed hair follicles. Caring for your scalp will greatly reduce sensitivity and itchiness.
There are many hat and cap styles today for sports, sun, cold, rain, wind, etc., to help you find something to cover and protect your head.
Eyebrows
Follow these steps:
- Hold a pencil vertically along the outside of your nostril and inner corner of your eye. Make a dot above your eye at this line, right on the brow bone. This is the inner edge of your brow.
- Hold the pencil vertically across your iris (the coloured part of your eye) and again make a dot above the eye, just above or on the brow bone. This is where your natural arch occurs.
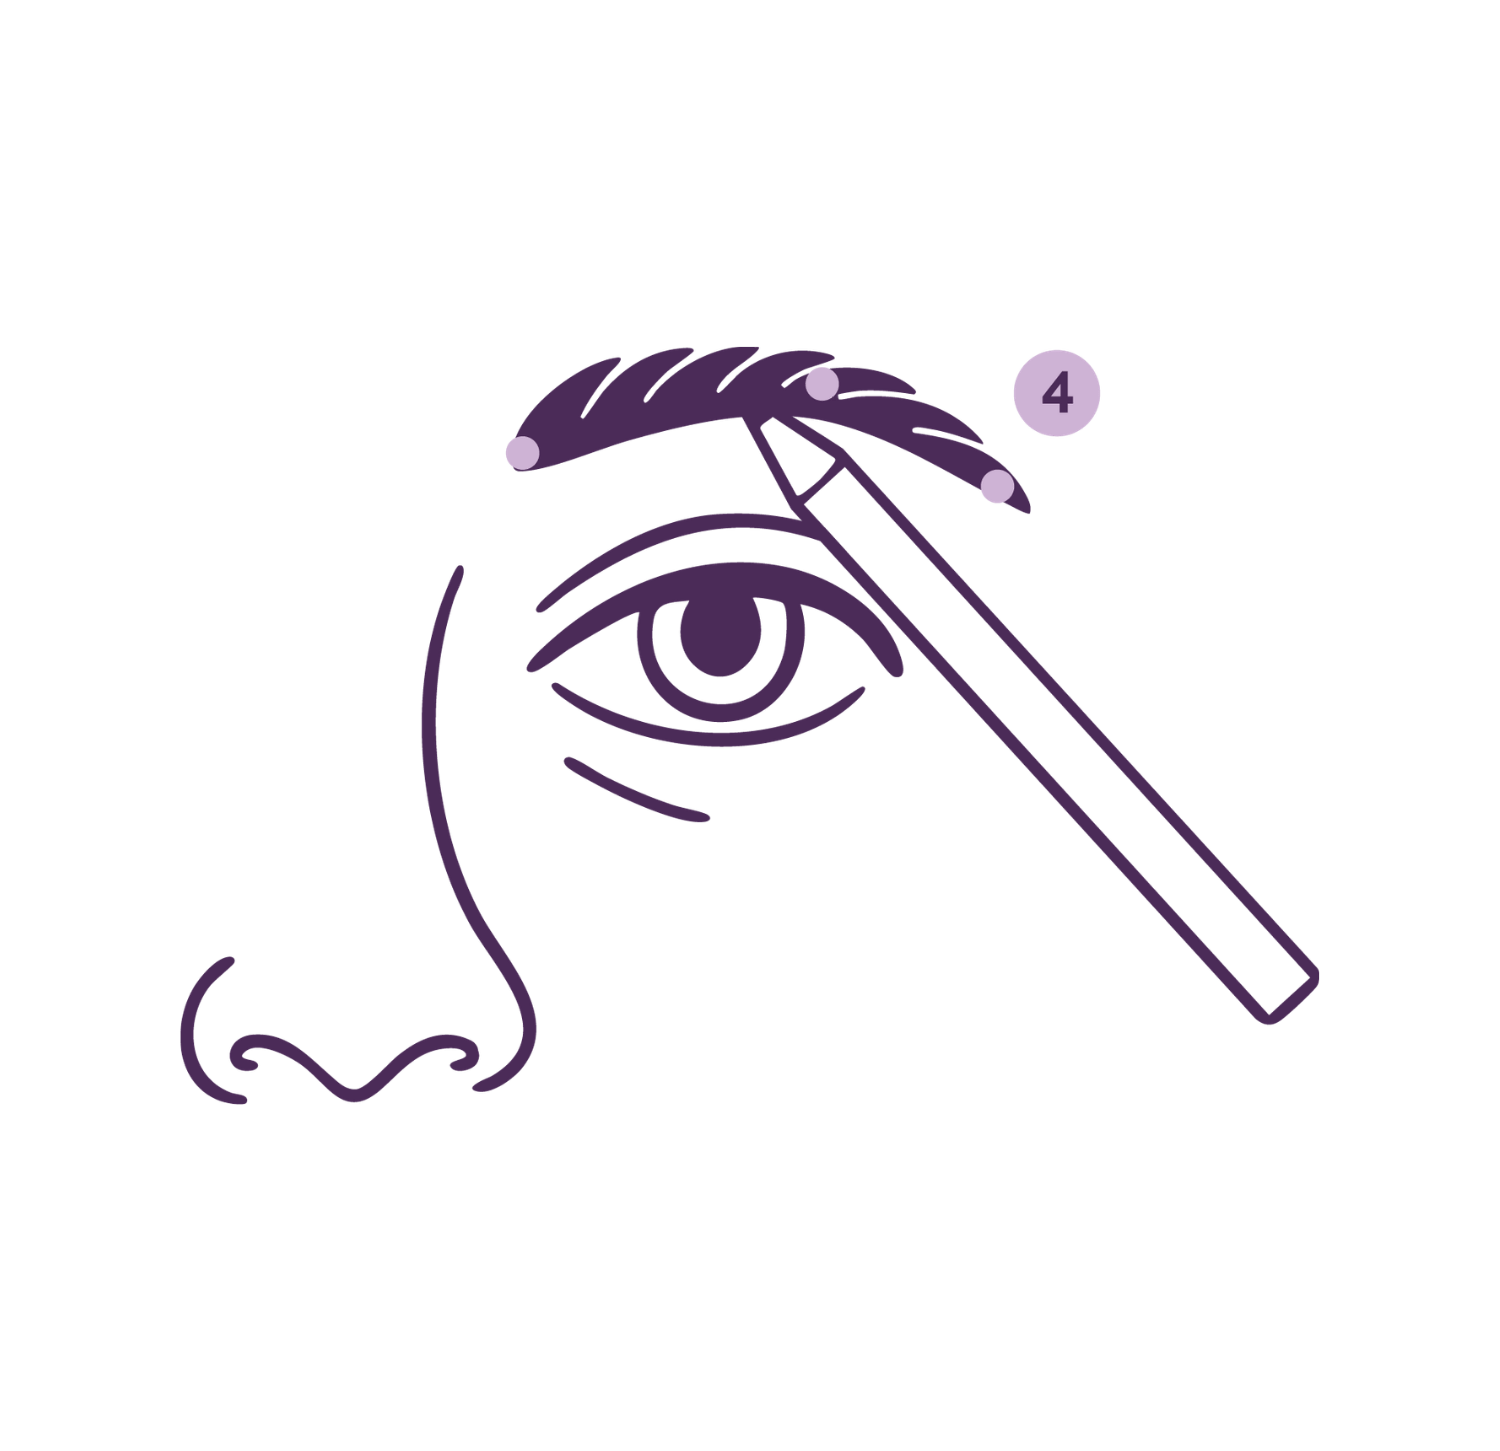
- Hold your pencil at an angle beginning at the outside edge of your nostril, lined up with the outside edge of the eye. This is where your brow should end. Draw another dot.

4. Connect these dots with a series of gentle, arching, feathery strokes to mimic the look of hair. Concentrate on fullness closer to the inner edge, thinning as you go outwards.
Another option to consider, particularly suited to men who wear glasses, is to opt for a thicker framed pair that’ll give the illusion of a fuller brow.
Hair Regrowth
Depending on the type and duration of your treatment, your hair will start to reappear at a rate of about ½ of an inch a month. Once your hair grows back, it may be different than before your treatment due to the absence or alteration of pigments. As the pigment cells return to normal, hair should go back to its original colour and texture.
Experiencing side effects?
Learn how to minimize and manage them in our Shaving & Men’s Skincare Workshop.
Let’s navigate this together
Join a community that understands. Receive expert advice, useful resources, and compassionate tips throughout your cancer journey in the LGFB newsletter
Newsletter Form
The Basics
The Three Basic Steps Are:
Step 1 – Cleanse
A facial cleanser will remove dirt and dry flaky skin and help stimulate circulation.
Look for products that say GENTLE, for SENSITIVE SKIN or for ECEZMA
Ideally, use a facial cleanser twice a day – morning and night
You can use a gentle body wash for the rest of your body
Have flaky skin, black heads or ingrown hairs?
Consider a gentle exfoliator once a week to get a deeper clean. Use it right before cleansing to leave the skin looking smoother, clearer and brighter. Again – look for a gentle option during treatment and try testing on a small area first.
Step 2 – Moisturizer
Moisturizer is hands down the most straightforward and effective way to keep your skin in top shape – apply after washing and patting dry your face.
While most men generally have oilier skin than women, treatment can have an drying effect your skin, so staying hydrated (both inside and out!) is fundamental.
Don’t forget LIP BALM – your lips may be extra dry or chapped during treatment. Keep things simple with a hypoallergenic lip balm with an SPF to keep you moisturized and prevent burning during the day.
Step 3 – Sunscreen
This is an absolute must-have!
One of the most prevalent side-effects of treatment is sun sensitivity
It is essential to wear daily sunscreen protection with a minimum of SPF30
Some Extras to Consider:
Hand Cream
Hydration is a key element in maintaining your skin during this time. Keep a hand cream by your sink.
Body Cream & Lotion
Having a body moisturizer will more than earn its place in your daily care while undergoing treatment. Dryness, irritation and possible skin cracking are all things you want to avoid so laying on the lotion is more than worth the effort. Apply after you shower or bathe, and throughout the day as needed.
Tinted Moisturizer & Concealer
There are some great tinted products out there that are very light-weight and natural. These products help minimize any redness, uneven skin tone and/or dark circles under the eyes. Always look for fragrance free hypo-allergenic products when picking up your grooming essentials as treatment can make even the most robust of skin a little more sensitive.
Experiencing side effects?
Learn how to minimize and manage them in our Shaving & Men’s Skincare Workshop.
Let’s navigate this together
Join a community that understands. Receive expert advice, useful resources, and compassionate tips throughout your cancer journey in the LGFB newsletter
Newsletter Form
Electric Razors or Wet Shaving During Treatment
During treatment your skin may be more dry, red, or itchy and will be more susceptible to cuts, bruising and infection, so it’s important to examine your shaving regimen.
Electric Razors
Many care teams recommend electric razors during cancer treatment. They’re less likely to nick the skin and will help avoid infections, especially when your skin is extra sensitive or your immune system is weakened.
Razor Blades and Wet Shaving
If you prefer to stick with a traditional razor and a wet shave, read our tips to help make it as safe and soothing as possible. Don’t forget to ask your medical team’s advice about shaving while in treatment.
Tips for Shaving with a Razor During Treatment
Shower before shaving or apply a warm towel/face cloth. This warms the skin, opening the pores and softening the hair cuticles.
Apply your chosen sensitive skin shaving gel or foam, ideally using a shaving brush, and make sure you generate a warm, rich protective lather. (Using a shaving bush softens and lifts the facial hair off the face helping to maintain good levels of hydration and lubrication).
Use light, gentle strokes, letting your razor do the work.
Facial hair grows in many directions so you’ll shave both with and against the grain. Shave in the direction that feels most comfortable.
Rinse your blades often.
After Shaving
Rinse with cold water. This will remove shaving cream residue, tighten pores and cool the skin.
Moisturize the whole face and neck area with a mild moisturizer.
Old dogs can learn new tricks.
Learn comfortable shaving techniques in our Shaving & Men’s Skincare Workshop.
Let’s navigate this together
Join a community that understands. Receive expert advice, useful resources, and compassionate tips throughout your cancer journey in the LGFB newsletter
Newsletter Form
Sun Care and Safety during Cancer Treatment
Radiation and chemotherapy treatments, as well as some medications, can increase your susceptibility to sunburn and skin damage. Sun care is especially important when you are undergoing treatment.
Receiving Radiation?
As a general rule, no sun exposure is a good idea when you’re receiving radiation treatment if the site of the treatment is exposed skin. Your doctor may not want you to put sunscreen or any cream on while you’re receiving radiation treatment as the skin is prone to injury at that time.
Sun Safety During Treatment
Apply sun protection daily and liberally – a dollop about the size of a golf ball – to all exposed skin, such as the lips, ears, scalp, sides, and back of neck
Get in the habit of applying sun protection every morning, about 20 to 30 minutes before going outside, and reapply often – about every two hours
Remember that you’re still exposed to UVA/UVB rays even in shady areas. If you’re indoors, windows do not protect against UVA rays
Stay inside during the intense-sun hours of 11 a.m. to 4 p.m. Wear clothing especially formulated with SPF when you have to go out into strong sun.
Have more skin-related questions?
Find practical answers in our Shaving & Men’s Skincare Workshop.
Let’s navigate this together
Join a community that understands. Receive expert advice, useful resources, and compassionate tips throughout your cancer journey in the LGFB newsletter
Newsletter Form
Eyebrows
The benefit of shaping and filling eyebrows: helps balance the eyes and flatter all other facial features.
If your eyebrows are sparse or have fallen out completely, you can define them or recreate them using a simple pencil technique.
How to create natural-looking eyebrows
Follow these 4 easy steps:
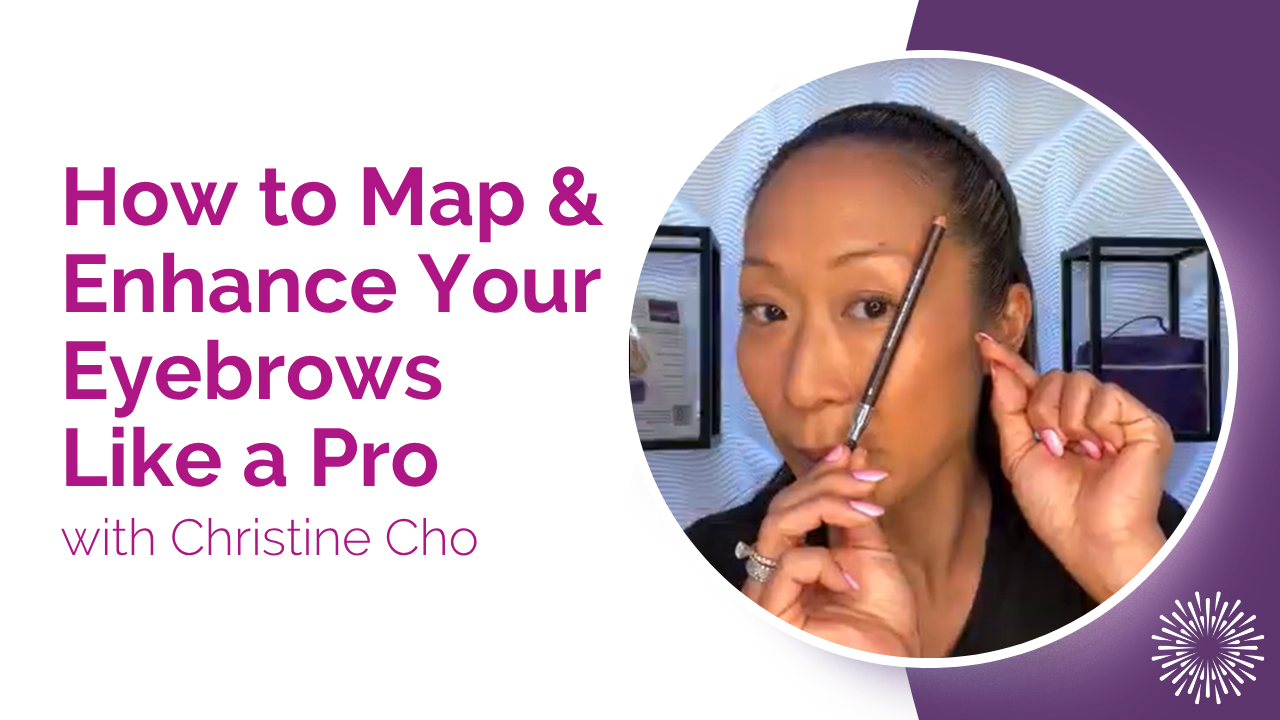
- Hold a brow pencil straight up against your nose, parallel to the inside corner of your eye. Draw a dot on the brow bone at this point. This is where your eyebrow should begin.
- Looking straight ahead, place the pencil parallel to the outside edge of the coloured part (the iris) of your eye. Place a dot where the highest point of the brow line should be. This is the arch of the brow. Use the orbital bone as guide to finding the highest point.
- Place the pencil diagonally from the bottom corner of your nose past the outside corner of your eye and draw a dot. This is the end of your brow. Be sure it’s not lower than the beginning of your brow, as this will create a down-turned expression.
4. Connect the dots into a brow line with light, feather-like strokes of colour, making the brow fuller on the inside corner and thinner as it moves out.
Eyebrow Tutorial
Eyeshadow
The benefit of eyeshadow: Brightens your look and helps define eyes.
Choose a neutral matte eyeshadow palette
Sweep a light shade over the entire lid and up to the brow
Apply a darker shade in a sideways v on the outer corner of the lid starting from the lash line and extending into the crease
Apply a highlight shade under your brow if desired
Blend well to soften the effect
Eyeliner
The benefit of eyeliner: works to define the lash line and create the illusion of full lashes.
Using an eyeliner pencil, draw small dots close to the root of the lashes on the eyelid.
Holding the eyeliner on a slant, starting from the inner corner of the eye, connect the dots at the very base of the lash line.
Using a cotton swab, gently blend. Use a little of the darker eyeshadow over the eyeliner to soften the look and help it last longer.
Make sure to avoid applying liner to your waterline
Mascara
The benefit of mascara: Restores a full look to thinning lashes.
Apply first to the top side of the lashes and then to the underside
Brush the mascara wand lightly across the lower lashes
Avoid waterproof mascara
Let's try this together.
Practice techniques with experts and find a community in our Skincare & Makeup Workshop.
Let’s navigate this together
Join a community that understands. Receive expert advice, useful resources, and compassionate tips throughout your cancer journey in the LGFB newsletter
Newsletter Form
Colour Accents
Your cheeks and lips are two places that can be hard hit by treatment side effects. With the right techniques and products, you can restore softness, protect sensitive skin, and enhance your natural glow.
Lips
The benefit of lip products: Brightens your look, lifts your spirits and comforts dry lips.
Choose a creamy, moisturizing lip colour from the same colour family as your blush
A light application of lip gloss will provide extra comfort to dry lips and adds the illusion of fullness
If your lips are very dry, use a moisturizing lip balm at night
Lip skin has very little protective pigment so use sun block product on your lips when outdoors
Blush
The benefit of blush: Provides a vibrant healthy look.
Use only a small amount of blush; it’s easier to add colour than to remove it
Smile! Add colour to the apple of your cheeks with a clean cotton ball
Blend along the cheekbone in an upward motion toward the ear
Like hands-on learning?
Get guided practice and support in our Skincare & Makeup Workshop.
Let’s navigate this together
Join a community that understands. Receive expert advice, useful resources, and compassionate tips throughout your cancer journey in the LGFB newsletter
Newsletter Form
Treatment over? Here are some product options…
Plump it up
Let’s talk about Hyaluronic Acid
If you've noticed your skin getting drier as you age, or that's just your skin type, one active ingredient to be on the lookout for is hyaluronic acid, especially in a serum.
The molecule, famous for holding 1000 times its weight in water, helps bring moisture to the surface of your skin. In the right formulation, it can produce immediate plumping effects, leaving skin looking dewy.
But for folks with very dry skin or who live in a dry climate, Dr. Julia Carroll, dermatologist and co-owner of Compass Medical, suggests layering moisturizer on top of your hyaluronic acid serum to seal it in and provide a barrier to moisture loss.
Brighten & Protect
Vitamin C is a workhorse ingredient and antioxidant
Helps improve uneven skin tone, fine lines, dullness and rough texture
Helps prevent oxidative stress caused by free radicals
"Antioxidant molecules help to neutralize these harmful atoms by giving up some of their own electrons. Think of it as nature’s “off” switch." – Dr. Vincent Richer, Medical & Cosmetic Dermatologist at Pacific Derm
Serum or Moisturizer
A serum and moisturizer combo can enhance your skincare routine —but what is the difference?
Serums are formulated to penetrate deeply into the skin to deliver targeted active ingredients. [This means they’re thinner and lighter to their creamier counterparts and also a more powerful delivery method]. Moisturizers help to reinforce the surface of the skin and work to increase hydration." – Dr. Arisa Ortiz, Harvard-trained & Board Certified Dermatologist
Layering Skincare Products
Whether you are a product minimalist or maximalist, the order you apply your skincare matters—both for your skin’s health and the products’ efficacy.
For the less-is-more folks, keep it simple: cleanser, moisturizer, sunscreen.
If your routine is more robust: cleanser, toner, serum(s), eye cream, moisturizer, face oil, sunscreen.
Still experiencing side effects?
Get expert advice from an onco-dermatologist in our Advanced Skincare Workshop.
Let’s navigate this together
Join a community that understands. Receive expert advice, useful resources, and compassionate tips throughout your cancer journey in the LGFB newsletter
Newsletter Form
Why Sun Protection Really Matters During Treatment
The sun can mess with your skin any time of the year, but if you’re going through cancer treatment—like chemo or radiation—it’s a bigger deal. Some meds and treatments make your skin extra sensitive, which means you can get sunburned way easier, and the damage can be worse.
Sun Safety During Radiation Treatment
If you’re getting radiation, it’s best to keep the treated area completely out of the sun. In fact, don’t put anything on that area—not even sunscreen—unless your radiation doctor says it’s okay. The skin around the treatment site is super delicate and can get hurt easily, so always double-check with your doctors/nurses first.
Everyday Sun Protection Tips (Even If You’re Not in the Sun Much)
Here’s how to protect your skin like a pro:
Use broad-spectrum sunscreen for your face (SPF 30 or higher). Look for one that blocks both UVA and UVB rays.
Cover up every exposed spot—your lips, ears, scalp (especially if you’ve lost hair), neck, chest… all of it. You want A LOT – think a golf-ball-sized amount.
Make sunscreen part of your morning routine—put it on about 20–30 minutes before you go outside
Reapply every two hours, especially if you're sweating or outside for a long time
Shade doesn’t block UV rays—you can still get sun exposure even if you’re chilling under a tree or umbrella
Try to stay indoors during peak sun hours: 11 a.m. to 4 p.m. And remember, UVA rays go through windows, so indoor sun isn’t totally safe either.
Rock a hat – The best kind is one with a wide brim (about 3 inches) to protect your face and neck
The Difference Between UVA and UVB Rays (Why It Matters)
- UVA rays go deep into your skin. They cause fast tanning, wrinkles, and can lead to skin cancer. Most UVA rays (about 95%) get through the ozone layer.
- UVB rays hit the surface of your skin and cause sunburns. They’re also a major cause of skin cancer. The ozone blocks most UVB rays, but some still get through.
Source: Health Canada
You’re not alone in this.
Connect with others who get what you’re going through in our Teens Workshop.
Let’s navigate this together
Join a community that understands. Receive expert advice, useful resources, and compassionate tips throughout your cancer journey in the LGFB newsletter
Newsletter Form
Before You Put On or Take Off Makeup or Skincare Products
Wash Your Hands
- Always wash your hands with warm water and antibacterial soap before putting on or removing makeup or skincare.
- Dry them with a clean towel or a disposable paper towel.
- If you’re out and about, keep a small bottle of hand sanitizer in your backpack or purse so you can clean your hands wherever you are.
Use Disposable Applicators
- Instead of using your regular brushes or sponges, go with clean disposable ones like cotton balls, pads, or swabs.
- Only use them once, then throw them away. You can usually find these at dollar stores or places like Walmart.
- Once you’re done with treatment, you can go back to using your regular makeup brushes—just remember to clean them often with gentle soap or brush cleaner.
How to Keep Your Makeup Germ-Free
Follow these Tips:
Try using makeup that comes in a pump bottle instead of jars (that way, you don’t have to dip your fingers in)
If you do use products in a jar, use a clean spatula to scoop it out (don’t use your fingers)
Always close your makeup lids tightly right after you use them
Don’t dip the same applicator back into your makeup after it’s touched your face
Never blow on your brushes, powders, or other makeup products—it spreads germs
Don’t share your makeup or skincare with anyone, even close friends or siblings
Not everything has to change during treatment.
Get tips about nails, skincare makeup and hair in our Teens Workshop.
Let’s navigate this together
Join a community that understands. Receive expert advice, useful resources, and compassionate tips throughout your cancer journey in the LGFB newsletter
Newsletter Form
Nail Care During Cancer Treatment
Cancer treatment doesn’t just affect your hair and skin—it can change your nails too. Your nails (and the skin around them) might get weaker, develop ridges, get thicker or discoloured, or even fall off. It might sound a little scary, but don’t worry—it’s only temporary and totally normal during treatment.
Tips to Keep Your Hands & Feet Healthy
Want to keep your nails and skin in good shape?
Try these easy tips:
Skip Cutting Your Cuticles – it can lead to cuts or infections (use cuticle cream to keep them soft and help avoid hangnails)
Moisturize Often – with a thick, rich hand cream (your hands will thank you!)
Keep Your Nails Short – so they're less likely to break or snag
Wear Rubber Gloves – when doing stuff like dishes or cleaning. Too much water exposure can cause nail infections
Nail Polish & Salons – What to know!
Still want to rock some nail polish?
Go for it and play it safe!
Stick with light or neutral pinks for a natural, healthy look
Use acetone-free nail polish remover – it's always less drying
If you go to the salon, let them know you're in treatment so they can be extra gentle and hygienic
Not everything has to change during treatment.
Get tips about nails, skincare makeup and hair in our Teens Workshop.
Let’s navigate this together
Join a community that understands. Receive expert advice, useful resources, and compassionate tips throughout your cancer journey in the LGFB newsletter